The most exciting part of this project has been reigniting my desire to vermicompost.. and then sharing it with a very special grade 2 class! (Visit again soon for my tutorial on how to start your own worm farm)
My grade 2 friends have been learning about life cycles lately. The life of the red wriggler, and what it eats and poops are a perfect way to explore an exciting cycle.
My own worm bin hadn’t multiplied enough to take any of our worm family out to start a second farm, so we sourced more worms from a local worm lover who was happy to donate them to us in the name of teaching the next generation of vermicomposters.
Each of the kids in the class helped to set up their new bin by adding natural and moist fibrous materials to the bottom of the bin, then sprinkling in some ground egg shells, and some already established compost.
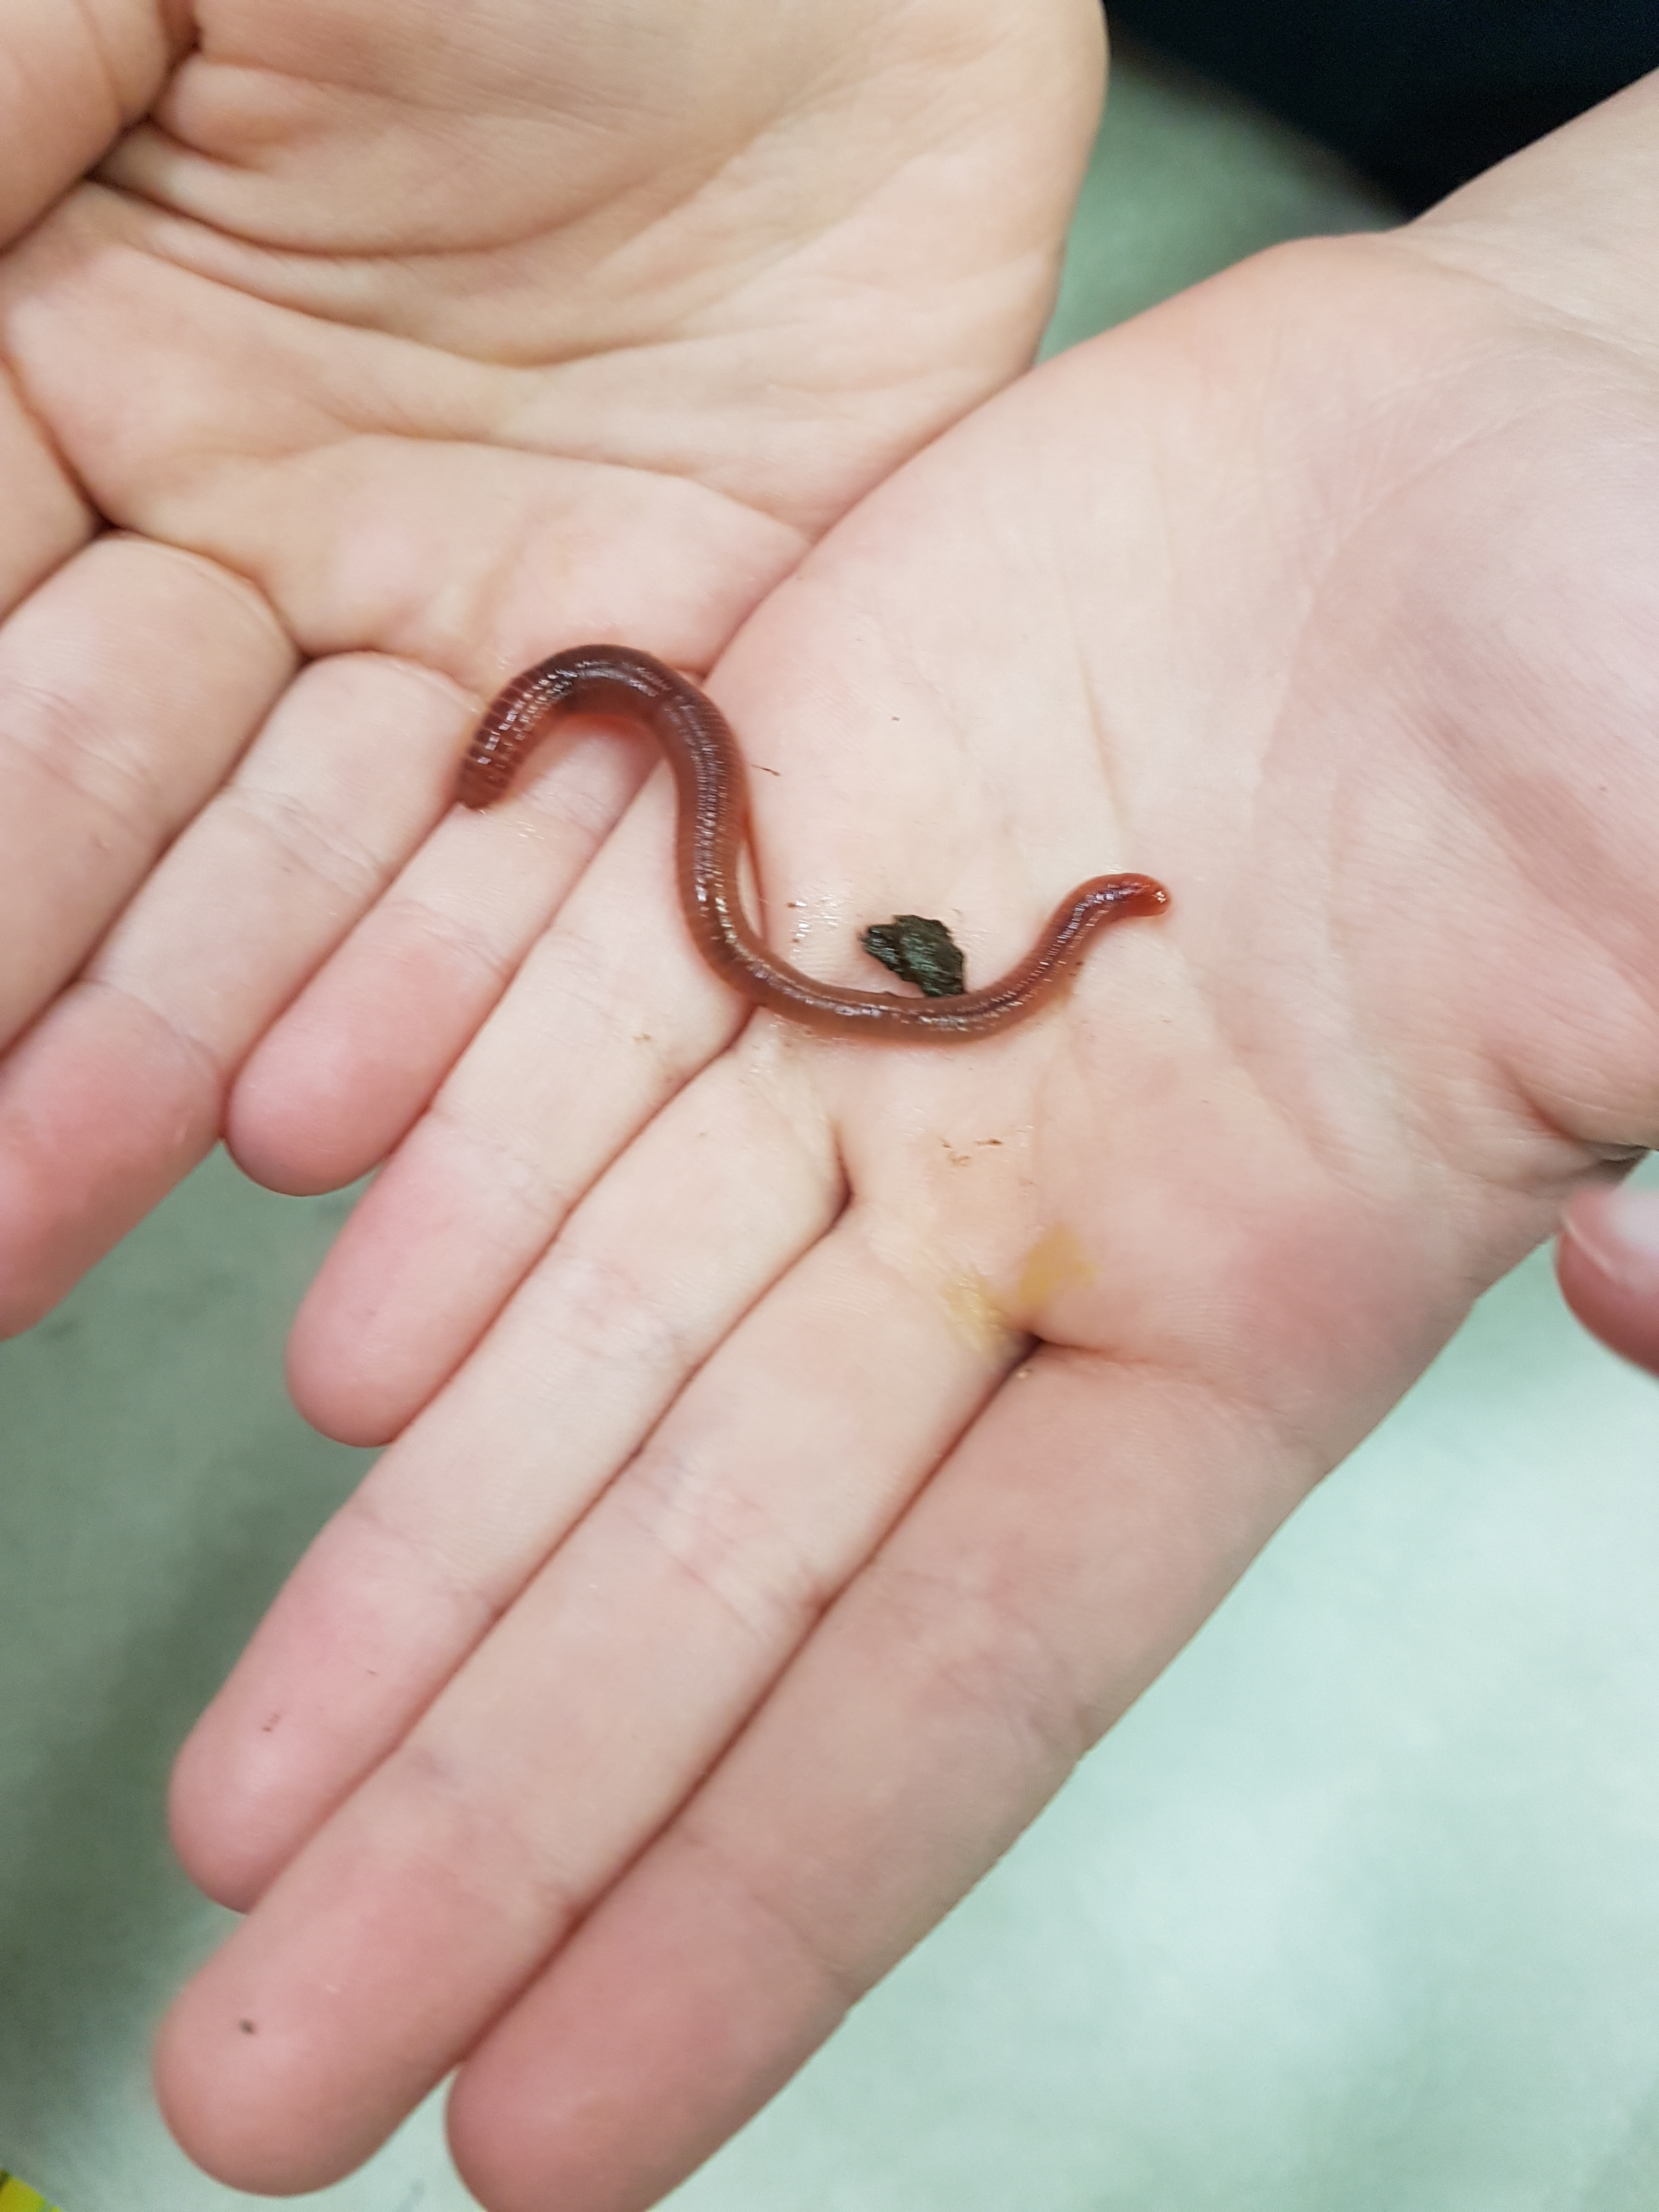
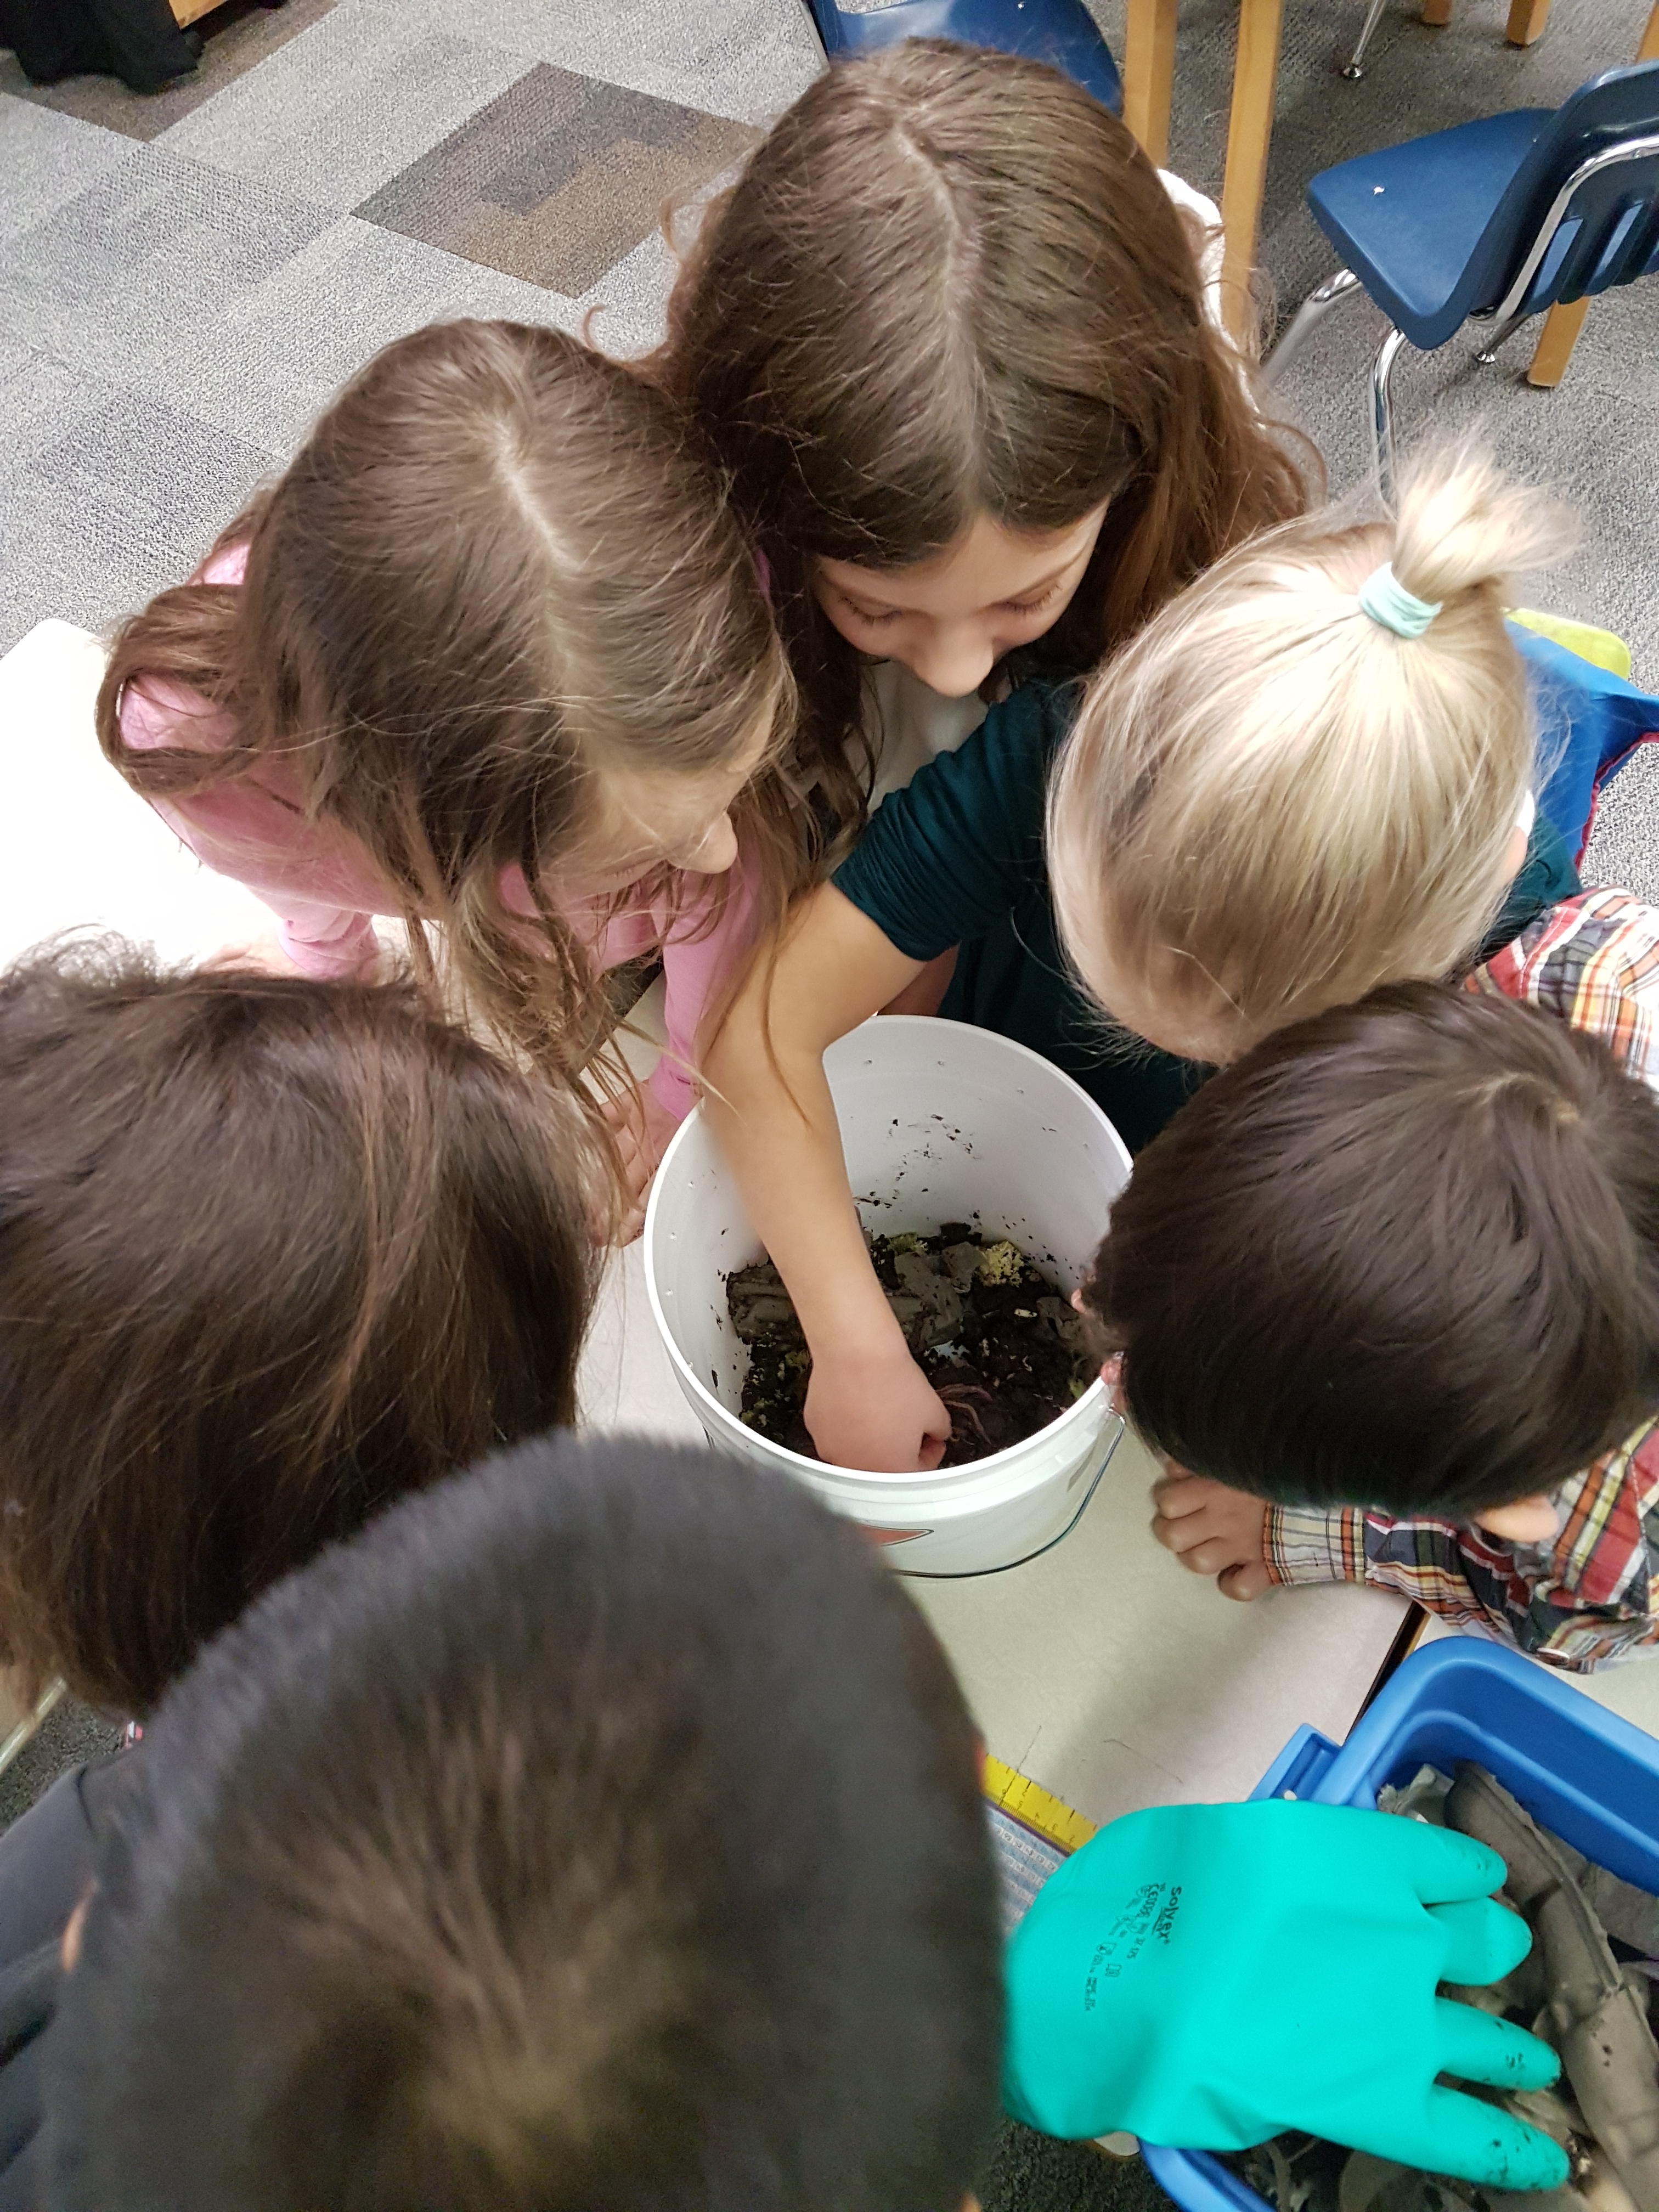
Everyone got a turn to dig through the worm pile, chose their favourite worm, identify what stage of the worm life cycle it was at, name it, and introduce it to its new home.

Worm day was an exciting one. The energy in the room was high and I had kids asking me all morning if we could take a peak and check on their new friends. Once the bin has some time to become established, the class will be able to identify newly lain eggs and baby worms, and compare the length and size of matured worms.

The food that the worms enjoy most are non-citrus fruits and vegetables other than peppers and onions. When they poop, we call it castings. Castings make for incredibly nutrient rich fertilizer for the garden, which makes for healthy crops.
Starting your own worm bin for vermicomposting requires very few materials and is simple to do. For this small classroom bin we used:
. A small opaque Rubbermaid bin
. Shredded brown egg cartons and toilet paper rolls (dampened)
. Ground egg shells
. Some prepared compost (or natural soil)
. Red wrigglers
